Showing posts with label Dessert. Show all posts

Thursday, December 3, 2015

Chunky Monkey Banana Ice Cream


I think everyone has been there.  You walk the frozen food section and see the pints of Ben and Jerry's ice creams.  You grab one thinking that you will only have a little and instead the whole thing is gone within an hour.  How the hell did that happen!!???
My weakness was always Chunky Monkey. Banana ice cream with walnuts and dark chocolate chunks.  It was addicting and I would eat the whole thing in one sitting.  

  Well, once we went paleo, I would try to skip that section of the store but the damn frozen fruit is right next to the ice cream. DAMN IT!! Chunky Monkey was taunting me constantly.  It would scream my name as I grabbed bags of frozen fruit and it took a lot of will power not to grab that little pint and devour it without anyone knowing.  I finally realized I needed to make my own version and get my fix before I caved and bought the pint. 

  I don't own an ice cream machine and I wasn't about to go buy one. I thought about getting the attachment for the kitchen aid but that would require another trip to the store, which I just didn't have time.  I knew there had to be another way.  So, I added a bunch of bananas (I looked for some that were really turning brown), some dark chocolate chips and some walnuts to my cart and left the store. 

  I had a couple of bananas already in the freezer.  They had turned brown at some point and I had read that you could freeze them and save for later. Well, lesson learned...you must peel the bananas prior to freezing!  Small detail I must have missed when I read this banana saving article.  It literally becomes impossible to peel a frozen banana so always be sure to peel before putting in the freezer.  I had to start over but I was lucky I got some really ripe bananas. So I peeled, broke up into smaller pieces, placed in a freezer safe bag and put in the freezer. Now I just had to wait. 

  Let me tell you, the first time I tried this paleo version of Chunky Monkey I swear, it tasted like heaven. The kids loved it and it has become a go to treat.  It literally tastes like Chunky Monkey but I may be a little biased.  Honestly though this is a great way to get your fix but still be healthy!  The kids think they are getting ice cream and so do I! 
Ice cream taunting is officially over. Well. At least for now.  Enjoy!
Happy Cooking and Eating!
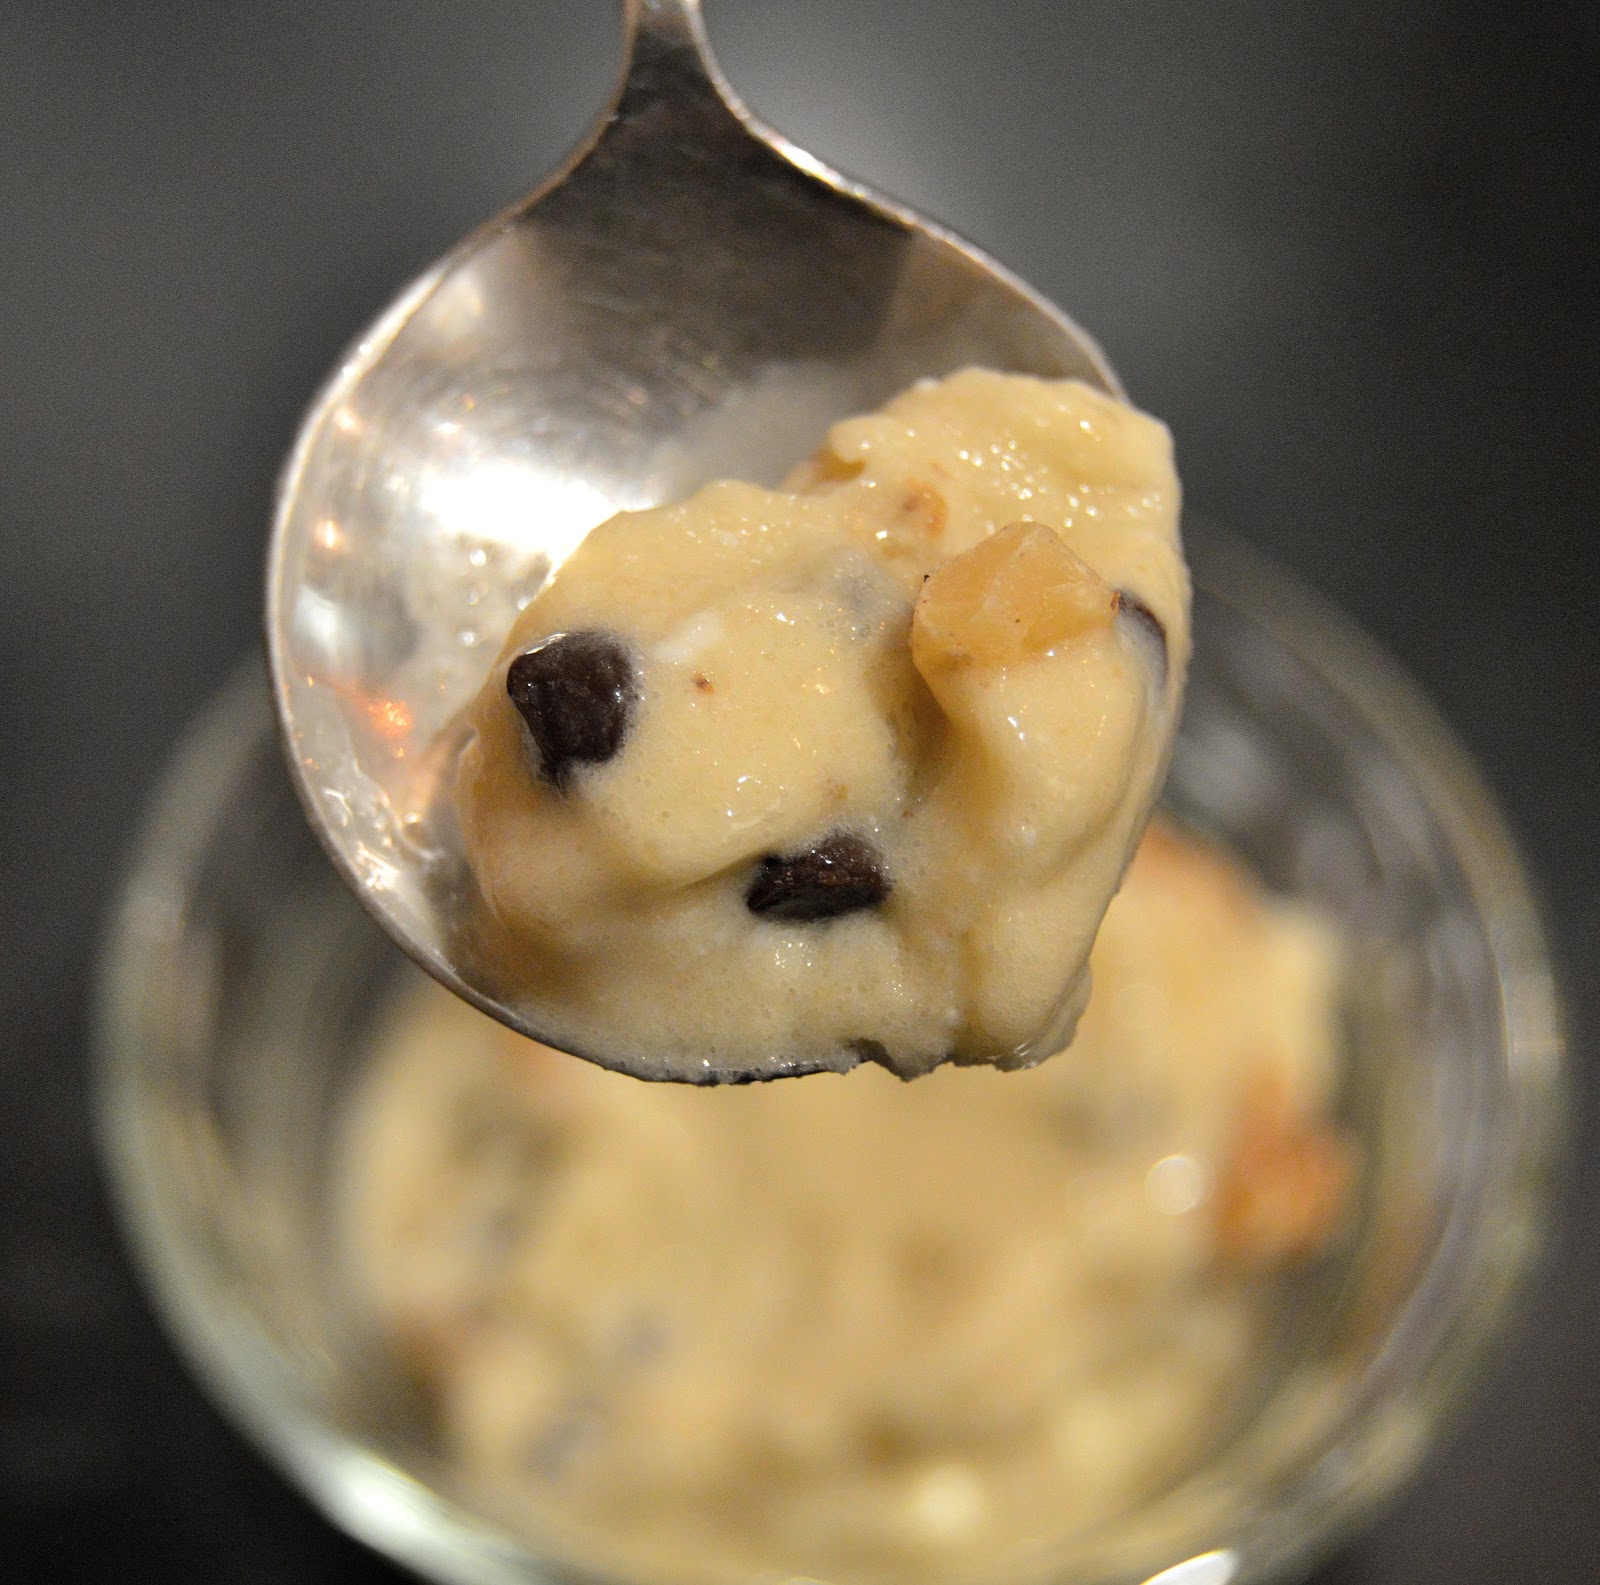

Chunky Monkey Paleo Ice Cream

Serves:4-6 people

Prep Time:5 minutes
Cook Time:0 minutes
Total Time:5 minutes


Ingredients:
  • 4 frozen bananas
  • 3-6 TBSP coconut milk (full fat, canned)
  • 1/3 cup dark chocolate chunks (Enjoy Life brand)
  • 1/3 cup walnuts
  • 1 tsp vanilla extract *optional
  • dash of salt *optional

Instructions:
  1. Place bananas, some coconut milk, salt and vanilla extract in blender or food processor.  Puree slowly until all blended.  You may need to add more coconut milk as you go depending on the size of bananas and how creamy you like it. 
  2. Once blended, transfer to a bowl and mix in walnuts and chocolate chunks. Serve or place in freezer for later.


Saturday, September 26, 2015

Easy Saturday Morning Blueberry Muffins


  You will start to notice that I use the word easy a lot.  Truth is I like things that are easy.  Don't most people?  I don't have enough time in the day to always do some elaborate creation.  Don't get me wrong, I enjoy that sometimes. But, not always in my kitchen and not always with my kids around.  Kids like to complain if things take to long.   Sometimes I just need to throw some thing together and be done. Plus, anything that is quick and easy typically means less dishes which I am always for! Dishes are my worst enemy and they attack me daily.  It's a never ending battle of dishes in my sink. Ughh!

  Most weekends are filled with things to do. If we don't have any sports or plans for the weekend, we create a plan.  I like getting the kids out of the house even if it's a trip to the park or library.  Anything to get them in a different environment and not make a mess in the house...is that even possible?  I swear these kids can destroy a clean room in a matter of minutes.  We actually call Kaine, our youngest, Hurri"KAINE" sometimes.  He will turn a room upside down in a second if you don't keep your eye on him.  Cutest little thing you will ever see but he is a monster, destroyer and a HurriKaine!

  As you can tell these kids keep me pretty busy.  I'm sure most parents can relate.  So, these muffins are perfect.  They are an easy thing to make in the morning and pop in the oven. Your kids can even help if they want. I use one bowl and the food processor.  Well, maybe some measuring cups and spoons too but really that's kind of a given, right?  Oh, and talk about easy clean up, I use silicone baking cups.  These things are awesome! If you haven't tried them you should.  They are great and dishwasher safe.  Really there is no negative to these things.  You always have them on hand and easy clean up.  SOLD!  These muffins will start your morning off right.  It's an easy process, clean up and doesn't take long.  It's a win win for everyone! 


Easy Saturday Morning Blueberry Muffins

Serves:1 dozen

Prep Time:5 minutes
Cook Time:20 minutes
Total Time:25 minutes

Ingredients:
  • 2 cups almond meal/flour
  • 1/2 cup frozen blueberries
  • 1/4 cup + 1TBSP canned coconut milk (full fat)
  • 2 eggs
  • 4 TBSP coconut oil (melted)
  • 2 1/2 TBSP honey
  • 1 1/2 TSBP coconut flour
  • 2 tsp vanilla
  • 1 tsp pumpkin pie spice or cinnamon
  • 1/2 tsp baking soda
  • 1/4 tsp salt

Instructions:
  1. Preheat oven to 350 degrees.
  2. Combine all wet ingredients (except blueberries)into food processor. Combine for about 1-2 minutes to get the eggs whipped.
  3. Combine all dry ingredients in a bowl then add to the food processor. Mix until all is combined. 
  4. Transfer mixture to the bowl and carefully fold in the blueberries. 
  5. Spoon a large amount of mixture into muffins cups. Filling up about 3/4 of the way, almost to the top.  Keep in mind these don't really rise so fill it up higher than traditional muffins. 
  6. Bake on the middle rack for about 20 minutes or until done. You will know they are done when you can stick a toothpick in and have it come out clean.
  7. Remove from pan and let cool for about 5-10 minutes. 


Thursday, September 17, 2015

Watermelon Mint Mojito Popsicles or Adult Beverage


  The weather has been quite deceiving lately.  You wake up and it's a little chilly but by midday the heat and sun are making you sweat. It's still so warm that the ice cream trucks are coming around the neighborhood.  I loathe the ice cream trucks!  It's my worst nightmare. Kids coming running as soon as they hear that annoying song and I instantly feel bad for my kids, Lucca and Kaine.  I seriously loathe the ice cream truck. Oh wait, I already said.  Well, I mean it, I hate that thing!

  A couple of weeks ago we were at the park and I started hearing that damn song come closer and closer until it stopped at the park.  Next thing I knew every kid in the park had a popsicle or ice cream cone except for my kids.  I used my common excuse "Sorry guys...I don't have any cash.  We will have a treat at home later.". But wouldn't you know it, a nice mom came up and offered to buy them  some ice cream.  Thoughtful, yes! But not what I needed.  At that moment the kids hated the lifestyle we live and just wanted to be like everyone else. They just wanted a popsicle or super hero ice cream thing.  It broke my heart to see my kids look at me with their eyes welled up asking why they couldn't have one.

  When I see a popsicle or ice cream cone, I see weird colors that aren't natural, tons of sugar and weird ingredients.  I'm a fun mom, can you tell?  I can spoil your fun in a heartbeat!  But seriously, why do popsicles have to be neon blue, green or orange?  Why is it so hard to just have a fruit juice popsicle?  I searched and even asked the driver if he had anything that was natural or had just fruit in it.  He thought and then pointed to a high fructose corn syrup filled and strange colored type thing. I knew it would be a long walk home of upset kids. 

  Ever since that day I try to have some sort of "ice cream" (dairy free) or popsicle treat in the house.  They both seem to be okay if they know they can come home and have a treat.  Of course me being the fun police that I am , I typically add some sort of veggie to the popsicles because that makes it more fun, right?  You honestly don't taste it and you can omit the spinach if you want.  But what fun would that be??  Anyway, these are really good and my kids love them.  The mix is tart and sweet and light and refreshing.  They really like limes and lemons so, I make them with a little extra lime juice.  But I'll give measurements for both in case you don't want that much tartness.  

  You know what else would be really good is making these into actual mojitos.  All you need to do is add some vodka (I use a potato vodka) and garnish with fresh strawberries, lime and mint. It can be your adult beverage while the kids enjoy their popsicle! Maybe that ice cream truck song won't be as annoying if you are enjoying a nice cold refreshing beverage. 

Watermelon Mint Mojito Popsicles

Serves:5-6 popsicles/drinks

Prep Time:5 minutes
Cook Time:0 minutes
Total Time:5 minutes

Ingredients:
  • 3 cups cubed watermelon (approx 1.25 lbs)
  • 1 cup strawberries (approx 8-10) with tops removed and halfed  
  • 3/4 cup cucumber (approx 1/2 cucumber), peeled, deseeded and cubed
  • 1/2 cup baby spinach leaves
  • 10-12 mint leaves
  • 4 to 6 TBSP fresh lime juice, depending how tart you like it

Instructions:
  1. Get out either your blender, food processor or emulsion blender.  Any one of these will work. 
  2. Place all ingredients into desired appliance and begin mixing until it is a liquid. 
  3. For popsicles - Pour mixture into popsicle molds and place in freezer for 4-6 hours or until frozen. 
  4. For adult beverages - Add 1-2 oz of vodka to ice filled glass and pour mixture on top. Garnish with mint leaves, lime wedge and strawberry. 

Friday, September 11, 2015

Chocolate Cake with Raspberries


When people first hear about the paleo lifestyle, the first thing they say is "That's impossible.  I can't give up bread, cheese or CHOCOLATE CAKE!!!".   Well, you are in luck my friend because I have an awesome chocolate cake recipe that is delicious and paleo! 

  I like sweets just as much as the next guy and I knew I needed chocolate to live. Seriously, I would die without chocolate. So, I learned to use what was good for me.  For instance, with this cake I use bananas as a sweetener.  If the bananas aren't quite as sweet as I like, I use a touch of honey. I use cocoa powder that creates more of a bitter chocolate taste which is why the raspberries balances it out but it's not necessarily needed.  I would eat this cake just by itself and I do quite often actually.  You could also add some sliced strawberries on top too.  YUM!

  Both of our kids love this cake and they think of it more as a cheat than a paleo treat.  Kaine, our youngest, isn't a big fan of cakes.  But he loves this one as long as we call it a cookie.  He's a weird little dude that just loves cookies or maybe just loves things because they are called cookies.  Who knows and who cares, I love him either way! He's my crazy monster man and you can't have him!

  Anyway, next time you have some bananas lying around with a bunch of brown spots on them, get this recipe out and make some chocolate cake. That's right ladies and gentlemen you can have this cake and eat it too! Oh my gosh! I am way to cheesy sometimes.  What do you expect though, I have two young kids!  My sailor swearing days are over. Well, at least until they go to bed.  Then I can eat some chocolate cake in peace while I swear a lot!  I have to get it out some time, right?  


Chocolate Cake with Raspberries

Serves:8-10

Prep Time:10 minutes
Cook Time:25 minutes
Total Time:35 minutes

Ingredients:
  • 3 ripe bananas
  • 3 eggs
  • 1 TBSP coconut oil (melted) plus 1 tsp to coat pan
  • 1 TBSP honey **optional**
  • 3/4 tsp vanilla extract
  • 1 cup almond flour/meal
  • 5 TBSP cocoa powder
  • 1 tsp baking soda
  • 1/2 tsp cinnamon
  • 1/2 tsp salt 
Raspberry Sauce
  • 6 oz fresh raspberries (approx 25 raspberries)
  • 2 tsp coconut milk (canned)
  • 1-4 to 1/2 tsp honey**optional**

Instructions:
  1. Preheat oven to 350 degrees. 
  2. Use about a tsp of melted coconut oil to coat your pan to prevent sticking.
  3. Get your food processor out and add bananas, eggs, coconut oil, honey (if using) and vanilla extract.  Puree/blend for about a minute.  You want to make sure there are no banana lumps and you want to whip those eggs a little. 
  4. Add remaining ingredients and puree until blended.  Scraping sides to make sure all ingredients are combined.
  5. Carefully pour batter into pan and bake on the middle rack for 25 minutes or until you can stick a toothpick in the center and it comes out clean.  Remove from oven and let cool. 
  6. While cake is baking, place raspberries in a bowl and mash with a fork.  Add coconut milk (and honey if using) and continue to mix until combined. 
  7. Cut cake into pieces and serve with sauce on the side.  Or on top. Or how ever you like to eat cake and sauce.